
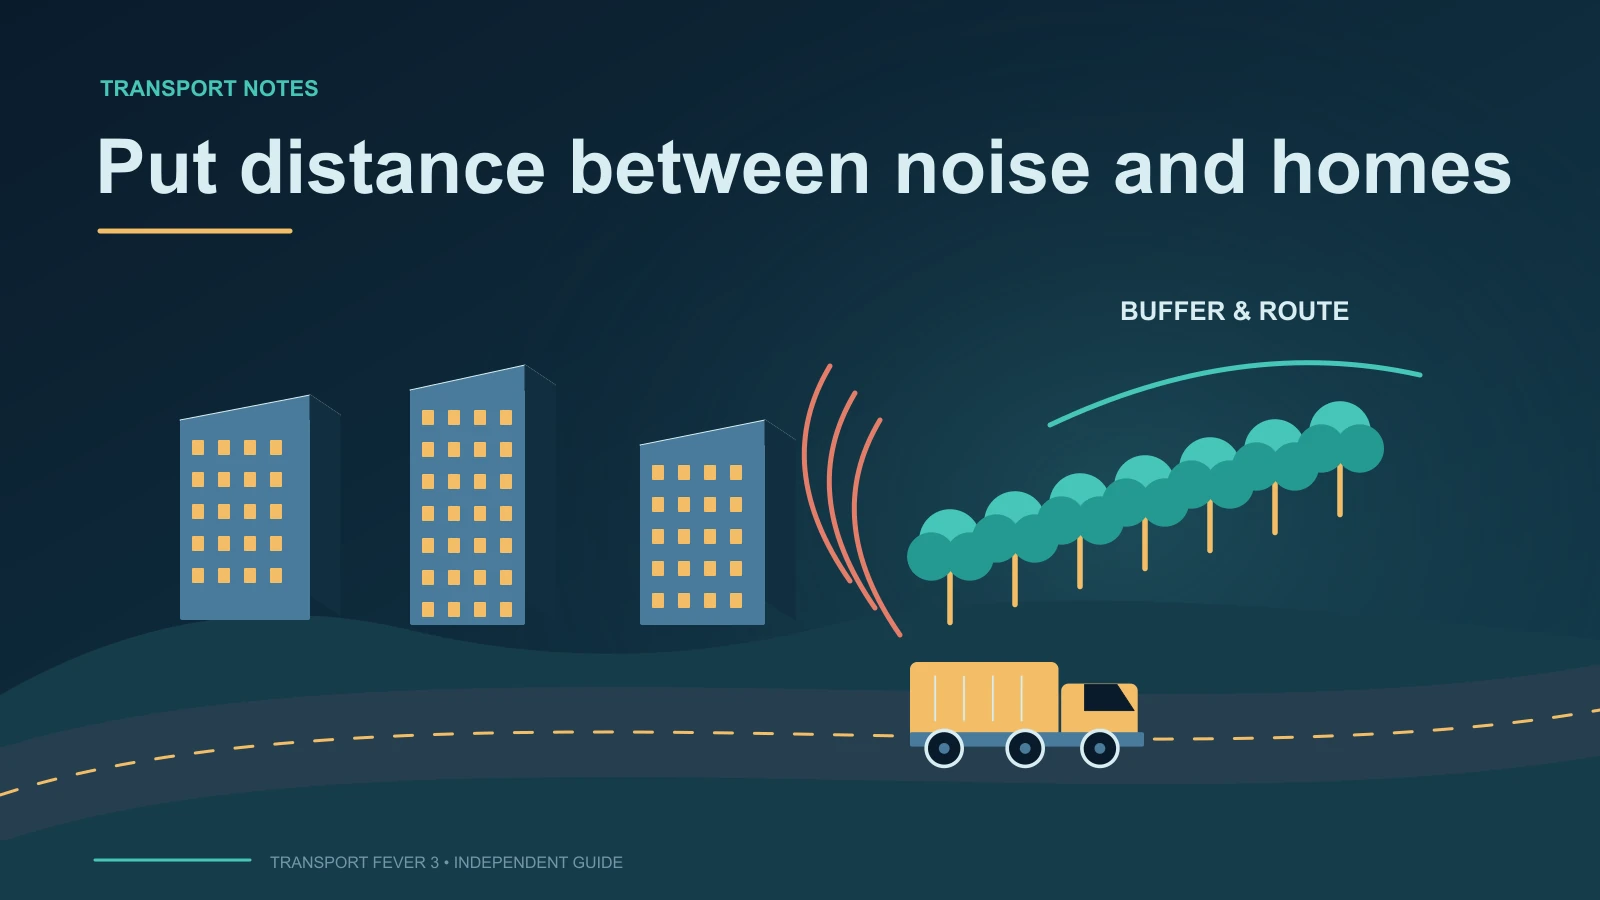
To reduce noise and pollution in Transport Fever 3, diagnose each problem with its own data layer before changing the network. The noise layer marks stronger noise with more saturated red and highlights affected buildings in orange. The pollution layer uses brown for emissions and green for absorption. Once you identify the source, keep noisy routes away from residential districts, redirect lines with waypoints where practical, compare vehicle noise and pollution values, and favor modern low-emission vehicles kept at a high maintenance level.
Noise and pollution have separate layers and town ratings. Read both when they overlap: a pollution-control facility can also create noise, and a route change needs to address the buildings exposed to the original problem.
Read the noise layer
Open the noise data layer whenever a town reports a poor noise rating or you suspect a transport corridor is affecting nearby homes. The layer highlights the areas reached by noise. Increasing saturation of red represents increasing noise, while affected buildings appear in orange. These two signals answer different parts of the diagnosis: the red field shows where the effect extends, and the orange buildings show which structures are currently affected.
Start with the orange buildings rather than assuming every red area is equally urgent. A loud corridor through non-residential land does not have the same supported consequence as high emissions around homes. The official town model specifically connects residential noise with town growth, so the most useful question is whether the highlighted buildings belong to a residential district.
Use the colors comparatively rather than assigning them an assumed safe percentage or fixed radius. Locate the strongest affected residential cluster, change the responsible source, and compare the same buildings afterward. The useful result is reduced exposure around those homes, not a quieter-looking patch elsewhere on the map.
Read the pollution layer
Open the pollution data layer separately. Pollution emissions are painted brown, while absorption is painted green. Stronger amounts appear with greater color saturation. This makes the layer useful for distinguishing a source area from an area that absorbs pollution, but it does not provide a supported conversion from color intensity to a numeric pollution value.
Trace concentrated brown areas back to nearby facilities, industries or transport activity before choosing a remedy. Green shows absorption, but its presence is not a guarantee that nearby emissions have been fully offset. Inspect the brown concentration and the town pollution rating rather than treating any green patch as proof that the problem is solved.
Noise and pollution can overlap without sharing the same solution. A cleaning plant, for example, addresses pollution when it is supplied with machines, but it is itself described as noisy. That trade-off makes layer-by-layer verification necessary: a cleaner pollution display is not enough if the noise layer now shows affected homes.
Confirm the exposed district
Use the land-use data layer to identify the district beneath or beside the hotspot. Residential buildings are green in that layer, commercial buildings are blue, and industrial buildings are yellow.
Residential districts require priority because they are sensitive to noise. Commercial and industrial districts are described as robust against noise and are not negatively influenced by it in the same way. This does not mean noise everywhere else can be ignored; it means the supported town-growth consequence is specifically tied to exposure in residential areas.
When evaluating a corridor, inspect its whole path rather than only its station. A route may leave a sensible station location and then pass through a residential district because the vehicles select the shortest path to the next stop. Conversely, a station near a town can look suspicious while the strongest affected homes actually sit along a different segment of the route.
The town window can also help frame the problem. Noise and pollution are two of six ratings used for the Town Authority rating, alongside reputation, happiness, delivery, and traffic. The overall authority rating is determined by the lowest of those six ratings. Improving noise or pollution therefore has the greatest authority effect when that rating is currently the weakest one. If another rating remains lower, a successful emission fix may not immediately change the overall authority rating.
Trace the hotspot to its source
After locating the affected district, identify the line, vehicle group, road segment, or facility associated with the strongest visible area. Work from the layer toward the source instead of rebuilding every nearby connection.
A practical inspection sequence is:
- Open the relevant town and note whether noise or pollution is the weaker rating.
- Turn on the matching data layer rather than treating the two ratings as interchangeable.
- Locate the strongest red or brown concentration inside the town area.
- For noise, look for orange affected buildings and confirm whether they are residential.
- Follow the visible corridor or activity back to the line, vehicles, industry, or facility producing it.
- Choose one targeted change that addresses that source.
- Reopen the same layer and inspect the same buildings after the network is operating again.
This procedure also guards against changing a profitable or important route for the wrong reason. If the noise layer shows no affected residential buildings along the suspected corridor, first check whether another source creates the actual hotspot. If pollution is the low town rating but the noise layer is the only one being inspected, switch layers before deciding what to rebuild.
Reroute noisy lines with waypoints
Trains, street vehicles, and ships normally use the shortest route between one stop and the next. That behavior can pull a line through a residential area even when another connection exists. Waypoints provide a supported way to influence the route without adding another passenger or cargo stop.
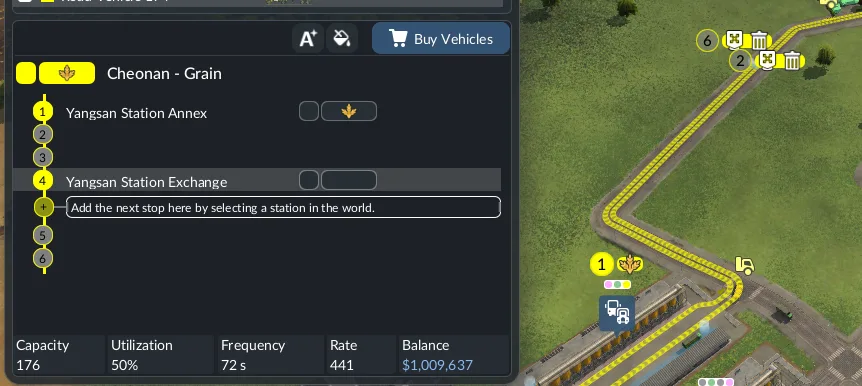
A waypoint redirects the line without becoming a passenger stop.
Place a waypoint on the preferred alternative and add it to the line's stop list in the same general manner as a station. The vehicle is then required to visit the waypoint, changing its route when the waypoint is not already on the previous shortest path. Vehicles do not stop at waypoints.
Use the noise layer to choose the alternative path. The objective is not merely to make the colored line look different in the line manager; it is to reduce exposure around residential buildings. A useful before-and-after check is whether the orange residential buildings disappear or whether the red saturation around them becomes less intense.
A forced path can be longer, so confirm that the line still reaches its required stops and remains useful after the detour. Check the actual line path: placing a waypoint on the route the vehicles already use will not move them away from the hotspot. The alternative needs to change the segment that exposes the residential buildings, rather than merely adding an extra entry to the stop list.
The gameplay demonstration “50+ Transport Fever 3 Tips I Wish I Knew Sooner!” shows an alley tool reducing vehicle noise and pollution at the cost of some top speed. If that tool is available in your street menu, consider it for a specific exposed road segment. Compare the environmental benefit with the slower route afterward; the demonstration does not establish a universal reduction percentage or an ideal road conversion for every town.
Choose lower-emission vehicles
The vehicle store provides a direct comparison point. Its detailed properties include pollution and noise alongside passenger comfort, loading speed, and technical data. The key summary around the vehicle image also includes cost, maintenance cost, availability, and cargo specialization.
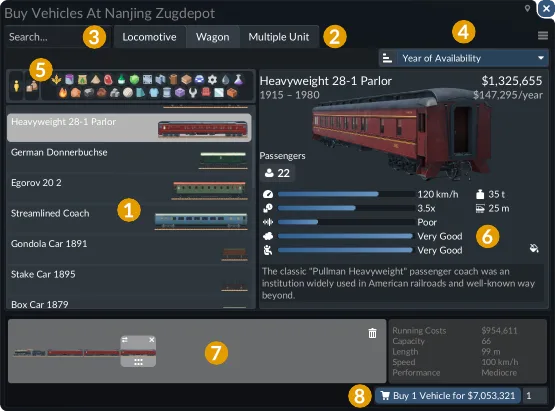
Check the vehicle properties here when comparing lower-emission options.
Use those displayed properties instead of assuming that every newer or more expensive vehicle is automatically better for the affected route. The supported recommendation is to use modern low-emission vehicles and keep them at a high maintenance level. The vehicle list, categories, search, sorting controls, and detailed panel can help narrow the available choices, but a replacement still needs to fit the line's actual passenger or cargo role.
For a noise-sensitive route, compare the noise property of suitable candidates first, then review pollution and the operational properties required by the line. For a pollution hotspot, reverse that priority while still checking noise if the route passes homes. Trains and trams can be assembled as consists, so examine the relevant units rather than assuming the locomotive alone represents the complete environmental result.
Compare the candidates available for the route instead of replacing vehicles solely by age or purchase price. A lower displayed emission property provides a reason to try a suitable replacement, but the map still determines whether the exposed homes benefit. Keep the line operating and inspect the original hotspot after the change.
High maintenance is part of the emission recommendation. If a low-emission fleet is not being maintained as intended, use the vehicle maintenance guide to address the service problem, then return to the environmental layers to assess the same corridor.
Control pollution without moving every route
Pollution may originate from a fixed source rather than a line that can be diverted. The same gameplay demonstration shows cleaning plants removing pollution when supplied with machines. If a cleaning plant is available in your build menu, account for that input before choosing it as the remedy. Placing the facility without the demonstrated machine supply does not reproduce the shown setup.
The plant creates a second consideration because it is also noisy. Before placing one, identify nearby residential districts with the land-use layer. After it begins operating, compare the pollution layer around the original brown hotspot and the noise layer around the plant. This checks whether the intervention improves pollution without shifting the town's weakest problem to noise.
The demonstration also describes greenifying an industry to reduce pollution affecting the closest town. If that action is available for the industry causing your hotspot, use it as a targeted intervention and compare that town’s pollution layer afterward. The video does not quantify the reduction or establish that the industry becomes emission-free, so judge the outcome from the affected area and its rating.
For a fixed source, distinguish the place producing emissions from the place where the town is affected. A cleanup facility should be assessed against that pollution problem, while its own noise needs a residential check. Moving transport infrastructure is useful when a route is responsible; it does not automatically solve an unrelated industry hotspot.
Verify the result
Recheck the same place with the same layer after every significant change. A reliable comparison keeps the town, district, and hotspot constant while changing only one major factor at a time.
For noise, verify three things:
- The line follows the intended route after a waypoint or street change.
- Red saturation around the targeted residential area is reduced.
- Previously orange residential buildings are no longer affected, or fewer such buildings remain.
For pollution, verify three different things:
- The concentrated brown emission area is reduced where the original source was identified.
- Any green absorption display is read separately from the brown emission display.
- A pollution intervention has not created an unacceptable noise hotspot near homes.
Then check the town breakdown. Noise and pollution each have their own rating, so improvement should be assessed in the matching category. Remember that the overall Town Authority rating follows the lowest of six ratings. If the environmental category improves but the overall rating does not, inspect which category is now lowest before concluding that the mitigation failed.
Interpret a partial improvement
If a waypoint changes the route but some homes remain orange, inspect the remaining affected cluster. Another line or facility may still expose those buildings, or the chosen alternative may pass too close to a different residential group. Work from the remaining noise display rather than assuming the first detour failed completely.
If a cleaner brown pollution area coincides with worse residential noise, check whether the new cleanup facility is responsible for the noise hotspot. The machine-fed cleaning plant shown in the gameplay demonstration has that trade-off. Evaluate the two ratings separately before adding another intervention.
If the environmental layer improves but the overall authority rating stays low, check the rating breakdown. The authority result follows the weakest category; a different category can remain the limiting factor after a successful environmental change. That is a reason to inspect the town's other problem, not to repeat a noise fix whose local result is already visible.
Keep each change tied to the original source and exposed district. This gives you a clear basis for retaining a useful mitigation or selecting the next source to investigate.
If environmental ratings improve but town growth remains limited, inspect the other growth requirements. If vehicle condition prevents the intended emission improvement, check maintenance coverage.