
Transport Fever 3 Mission 3 is Desert Adventure, an expedition with Nasra through Wadi Rum, Jordan. The safest route is to establish maintenance coverage before moving farther into the desert, advance between camps instead of attempting one long exposed journey, recover the remains while your expedition is nearby, and finish the highlighted excavation with the terrain tool.
Truck survival determines two of the three stars. Losing fewer than three trucks satisfies the second loss condition, while losing no trucks is required for the stronger third condition. If you want every star, treat zero losses as the standard from the first delivery onward. The exact supplies requested, current destinations, and excavation progress should always be read from the active objective counters and marked locations rather than assumed in advance.
Mission 3 Goals and the Safest Order
The mission goals separate basic completion, truck preservation, and the optional medal objective.
| Goal | Completion requirement | Practical priority |
|---|---|---|
| First star | Complete the excavations | Finish the highlighted dig objective after preparing the route |
| Second star | Lose fewer than 3 trucks before the excavations are complete | Keep total truck losses to two or fewer |
| Third star | Lose no trucks before the excavations are complete | Protect every expedition truck until excavation completion |
| Medal | Recover the remains | Collect them while the expedition is already operating nearby |
A practical expedition plan is maintenance first, controlled desert movement second, remains recovery while nearby, and excavation last. The truck-loss conditions are evaluated before excavation completion. Keep those goals in view as you prepare the route; this planning order does not replace the active mission objectives.
Prepare Before Moving Deep into Wadi Rum
Mission 3 punishes premature expansion. Your first task is not to send a large convoy as far as possible; it is to create a dependable maintenance foothold and preserve the trucks that will support the rest of the expedition.
- Read the current objective and identify its marked destination.
- Use only the vehicle capacity needed for the opening movement. A single truck can handle the initial establishment run described by the mission route, so there is no benefit in exposing the entire convoy before maintenance coverage exists.
- Inspect the vehicle condition section before committing the truck to a longer uncovered stretch.
- Keep the first movement focused on establishing the marked maintenance point outside Aqaba.
- Confirm that the new camp is available before sending additional trucks farther into the desert.
This sequence limits the number of vehicles exposed during the most uncertain part of the route. It also gives later trucks a nearer place to recover condition instead of forcing every endangered vehicle to return all the way to Aqaba.
Build the First Maintenance Foothold
The first maintenance camp changes the mission from one long desert crossing into a sequence of shorter movements. Deliver the supplies shown by the active objective to the marked location outside Aqaba. Use the current mission counter and continue the delivery until the objective confirms that the camp has been established.
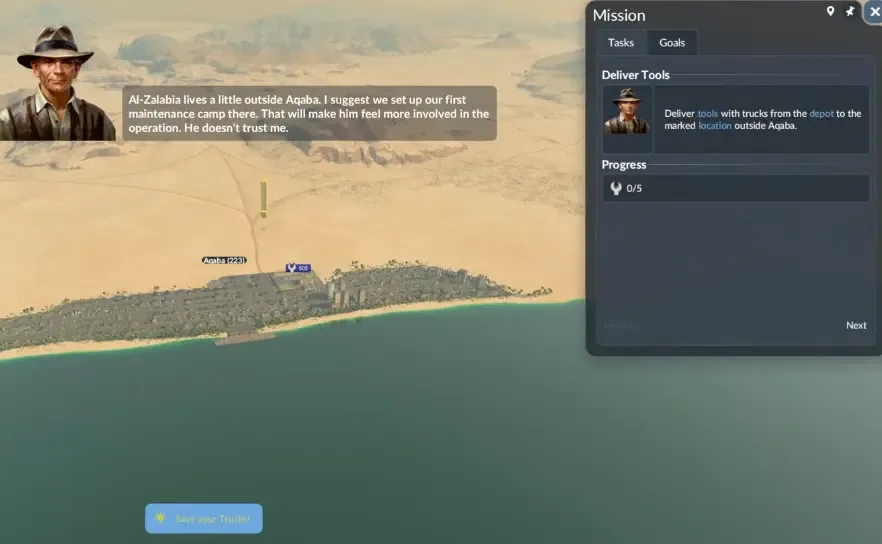
The marked delivery destination for establishing the first maintenance camp.
Once the camp appears, treat it as the expedition's forward safety point. The opening truck should reach and establish this location before the rest of the convoy is committed to deeper objectives. Sending several trucks ahead while the route still lacks forward maintenance only multiplies the number of vehicles that can lose condition at the same time.
Before continuing, verify three things:
- The opening delivery objective has advanced or completed.
- The maintenance point is now part of the usable expedition route.
- The next movement ends at, or close to, another reachable maintenance area rather than in an unsupported part of the desert.
The camp is a stepping stone, not proof that the entire desert route is safe. Its value comes from shortening the exposed portion of the next trip.
Move Between Maintenance Camps
The core of Desert Adventure is managing the gaps between maintenance areas. Trucks begin losing condition when they remain outside maintenance coverage. A short exposed section can be manageable when the next camp is close, but a long unexplored gap can leave a truck too far from safety by the time its condition warning becomes serious.
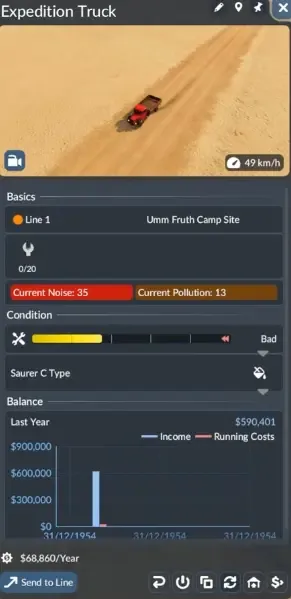
Check the expedition truck’s Condition panel before another desert leg.
Advance one protected stage at a time:
- Start from a functioning maintenance area.
- Identify the next camp or marked expedition destination that can extend the protected route.
- Send the minimum necessary vehicle movement across the uncovered gap.
- Establish or reach the next maintenance point before expanding traffic through that section.
- Repeat the pattern as new camp objectives become available.
This approach avoids turning the mission into a race between a deteriorating truck and a distant destination. It also keeps the recovery choice simple: when a vehicle needs maintenance, there should be a reachable camp ahead or behind it.
Read the Vehicle Condition Information
The vehicle condition section shows how well a truck is maintained and whether its maintenance state is modifying its properties. Its upper section can display maintenance history, while the lower section provides vehicle information and current condition-related modifiers.
Use that information as a decision checkpoint before another desert leg. Check the truck's displayed state and current warning alongside the nearest reachable maintenance area. The maintenance history helps you inspect how the truck has been maintained, while the current modifiers show how its present condition affects it. Read both sections before deciding on another uncovered leg; a warning needs attention even when the planned expedition destination is still ahead.
React to a Condition Warning
If a truck is already losing condition, direct it toward the nearest reachable maintenance area. That may be a forward camp rather than Aqaba. Automatically ordering a full retreat can make the vehicle travel farther through uncovered terrain even when a closer protected point is available.
Do not send more trucks into the same gap while the first vehicle is struggling. Stabilize the active movement, confirm the next maintenance point, and only then resume the expedition. This keeps one warning from becoming several simultaneous risks.
Protect the No-Truck-Loss Star
The no-loss condition applies until the excavations are complete, so truck preservation remains relevant during the entire mission. Reaching the dig area does not make an exposed vehicle elsewhere on the route irrelevant.
The second star allows fewer than three truck losses, which means no more than two. The third star allows none. Planning for the third star automatically gives you the clearest operational target: every maintenance decision should preserve every truck until the excavation objective is finished.
Recover the Remains Before the Final Excavation
Recovering the remains is the requirement for the mission medal. Handle this side objective while the convoy and its maintenance route are already operating near the marked area. Waiting until after every other expedition task creates an avoidable return journey through the same desert gaps.
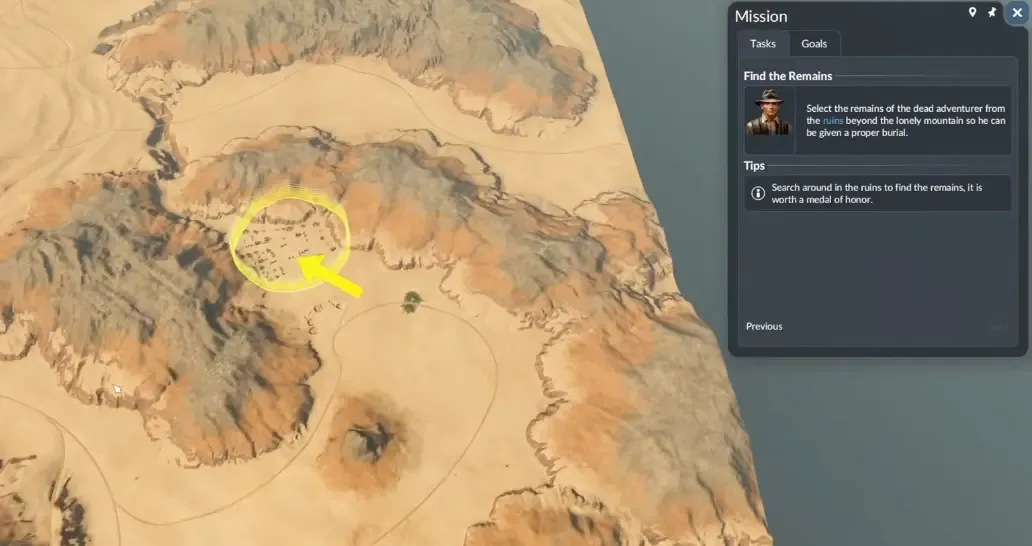
The remains location for the special reward objective.
Use the active marker to identify the remains rather than searching from an unsupported coordinate description. When the expedition reaches the relevant part of the route, pause the push toward final completion and resolve the remains objective before leaving the area.
A simple decision check prevents the medal from being overlooked:
- Confirm that the remains objective is visible in the current mission tasks.
- Follow its marked location while your maintenance route already supports travel through that area.
- Complete the recovery action indicated by the objective.
- Verify that the remains task has registered as complete.
- Continue toward the final excavation after checking the recovery result.
The remains are separate from the excavation completion goal. Digging successfully does not replace the recovery requirement, so check both objectives independently. Recovering the remains while nearby avoids unnecessary travel; it is a planning recommendation rather than a stated prerequisite for beginning the excavation.
Complete the Excavation With the Terrain Tool
The final excavation is not another cargo delivery. When the highlighted dig area appears, use the terrain tool directly inside that zone to uncover the required finds. The active objective counter indicates whether your work is advancing and when the excavation is complete.
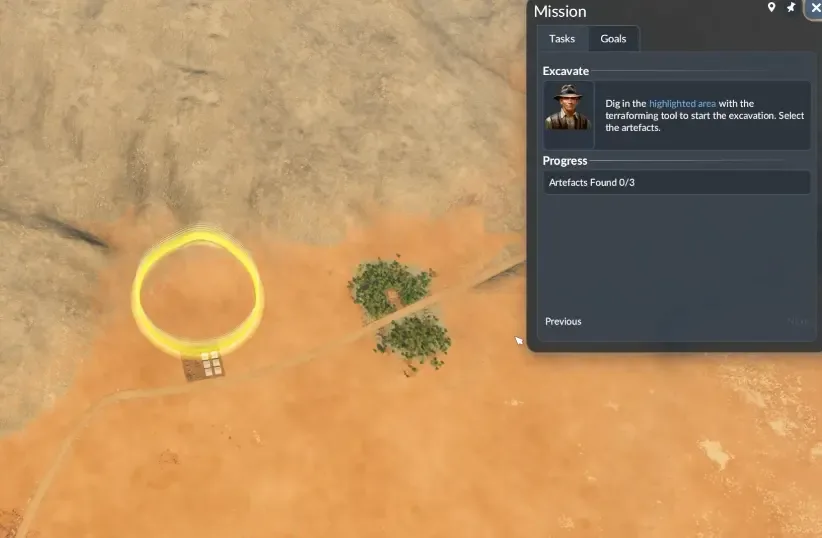
The highlighted excavation area and its objective counter.
Follow this sequence:
- Wait until the mission displays the highlighted excavation area.
- Select the terrain tool rather than sending another delivery vehicle into the zone.
- Apply the tool inside the highlighted boundary.
- Watch the active excavation counter after each attempt.
- Continue working within the marked area until the objective confirms completion.
If the counter does not advance, recheck that you are acting inside the current highlighted zone and that the terrain tool is selected. Do not widen the search based on an assumed artifact count or an unmarked location. The mission's visible area and counter provide the completion test.
Before finishing the last excavation requirement, make one final review of the route. Confirm that no truck is deteriorating between camps, that the loss objective still shows the result you want, and that the remains have been recovered if you are pursuing the medal. Excavation completion is the point referenced by both truck-loss conditions.
Mission 3 Troubleshooting
The Excavation Objective Is Not Progressing
Check three elements: the highlighted dig boundary, the selected terrain tool, and the active objective counter. The excavation requires terrain work inside the marked area. Use the marked area for the terrain work and check the counter instead of treating another transport delivery as excavation progress.
Let the counter determine whether the excavation action succeeded. Continue within the active zone until the mission records completion.
The No-Loss Goal Has Already Failed
The third star explicitly requires losing no trucks before the excavations are complete. The second loss condition is less strict: fewer than three losses. If a loss has occurred, protect the remaining vehicles and keep the total below three if you still want to satisfy that condition.
Do not let one loss cause a rushed finish. The maintenance route is still needed to protect the other trucks until excavation completion.
The Medal Is Still Incomplete
The medal requires recovery of the remains. If the excavation has not yet been completed, follow the remains marker and resolve that objective before finishing the dig. The safest timing is while the convoy and maintenance route are already operating in the same part of the desert.