

Tools in Transport Fever 3 are a Goods-class cargo produced by the Tool Factory. Its production rule is 4 Planks plus 2 Plastic into 5 Tools. Tools serve industrial districts that demand them and act as a cargo booster for specific raw industries, including Coal Mines and Oil Platforms. They are not the same as the interface's road, landscaping, or construction tools.
Build a complete Planks-and-Plastic supply route to the factory, then choose an actual accepting destination for the output. If you send Tools to an industry booster, verify the booster and its input stock. Extra production is useful only when the receiving industry's output and its onward delivery can also be handled.
Identify the Tools cargo and its transport class
Open the Tool Factory or inspect the cargo entry to confirm you are following the Tools item. The game's interface also uses the word “tools” for construction menus, so a search result or video mentioning tools can describe an entirely different task.
For this supply route, Tools belong to the Goods cargo class. Select compatible vehicle capacity and a stop configuration that can load that cargo. A bulk wagon used for Coal is not made suitable for Tools by sending it to the Tool Factory.
The factory's inputs use different classes: Planks are Flatbed cargo and Plastic is Goods cargo. A single transport plan therefore needs to account for the actual input loads rather than treating every factory-related item as one interchangeable freight.
| Cargo in this production route | Role | Cargo class |
|---|---|---|
| Planks | Required Tool Factory input | Flatbed |
| Plastic | Required Tool Factory input | Goods |
| Tools | Tool Factory output | Goods |
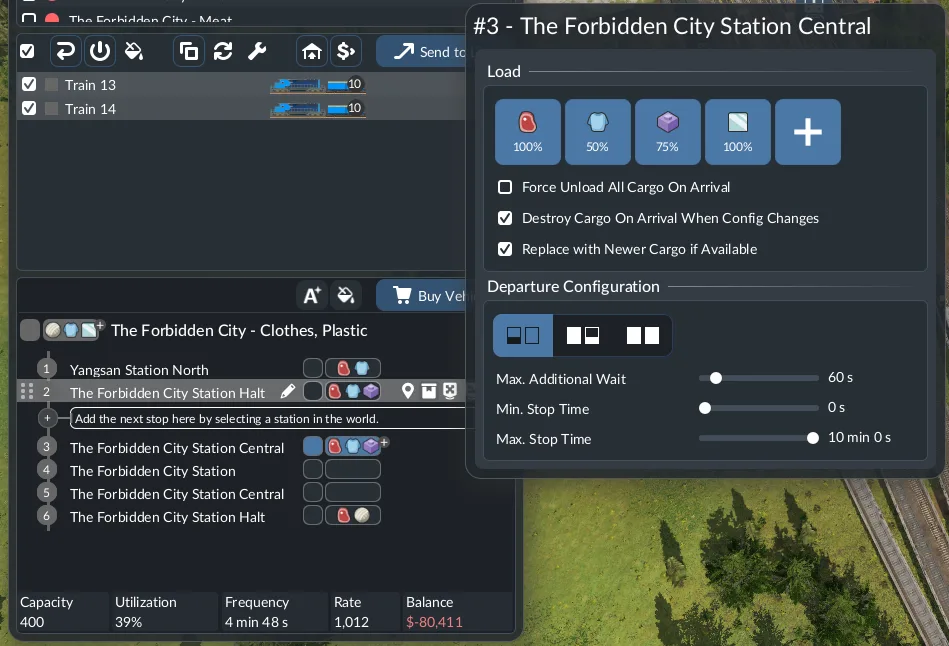
Check the Goods-compatible loading filter when configuring a Tools delivery. This panel illustrates cargo filtering, not the Tool Factory recipe.
Use the cargo compatibility shown for the actual selected vehicle. Some vehicles support several cargos, while others are restricted. The cargo class is the starting constraint, and the selected vehicle's configuration is the check that confirms the intended payload.
Supply both factory inputs
The Tool Factory recipe consumes 4 Planks and 2 Plastic to produce 5 Tools. Those values are recipe proportions. They do not guarantee a fixed annual output independent of input availability, workers, or the factory's actual production state.
Choose the source facilities supplying both inputs and trace their complete routes to the factory. If the Planks route works but Plastic never arrives, the factory has not received a complete set of inputs for the production rule. Doubling Planks transport is not a replacement for the missing Plastic.
Planks come from a Saw Mill, whose production rule uses Logs. Plastic comes from a Chemical Plant, whose production rule uses Chemicals and also produces Dyes. You can use existing supplies in the save; you do not necessarily need to construct every preceding transport leg anew.
Inspect the Tool Factory's Input Stocks to see whether the required cargos arrive. Follow the actual stored quantities rather than inferring delivery from a nearby loaded train. The receiving factory is the end state of each input route.
When inputs arrive unevenly, find the cause on the corresponding leg. A vehicle waiting to load, an incompatible wagon, a missing transfer, and an unreachable final stop need different corrections. Keep the two input paths separate until each has demonstrated a delivery.
Read factory production and output stock
The industry window shows the production rule, recent consumed and produced cargos, input and output stocks, supplier and consumer relationships, and cargo-flow information. Use these fields to distinguish production from transportation.
A factory producing Tools can still accumulate output if the pickup service is missing or incorrectly configured. The output remains at the industry until a suitable vehicle on an appropriately configured line collects it.
When output reaches its stock limit, excessive produced cargo is destroyed. A full output stock is therefore not proof that adding another factory-input vehicle is the right investment. First check whether the existing Tools output can leave the factory and reach its destination.
The general worker booster is another way to increase industry throughput when enough workers arrive frequently. That does not make Tools an optional input booster for every processing factory. At the Tool Factory, the stated Planks-and-Plastic recipe is the production requirement you need to satisfy.
For a sustained route, inspect both sides: inputs available for production and output being collected. A temporary pile of Tools can hide an interrupted input supply, while a continuing production flow can hide excessive destruction if the pickup capacity is insufficient.
Choose between town demand and an industry booster
Tools have more than one receiving context. They can be delivered to an industrial district that currently demands Tools, and they are a booster cargo for certain raw industries. These destinations are not interchangeable.
Before sending them to a town, inspect that industrial district's actual cargo demand. Towns develop additional needs as they grow. The presence of a Tool Factory on the map does not establish that every town wants its output immediately.
Before sending them to a raw industry, inspect that industry's specified booster. Tools are one of the game's booster cargos, alongside Fertilizer and Machines, but each receiving industry uses its own listed cargo. Delivering Tools to an industry that requires another booster does not start the intended effect.
| Tools destination | Desired result | Check before assigning output |
|---|---|---|
| Industrial district | Supply the district's current Tools demand | The actual town's required cargo |
| Raw industry | Start or sustain its Tools cargo booster | That industry's booster type and input stock |
| Intermediate storage | Hold Tools for a later outgoing route | Accepted cargo and complete onward connection |
Do not judge the final delivery by proximity alone. The receiving district or industry needs a usable cargo connection at the destination. An intermediate warehouse can be useful, but storage is another stage rather than the final consumption result.
Find the industries that use Tools as a booster
The listed raw-industry Tools booster recipients are Clay Pit, Coal Mine, Fishing Grounds, Oil Platform, Quarry, and Sand Pit. Match the delivery to the actual industry present in the map.
| Raw industry | Output affected by its booster | Practical destination check |
|---|---|---|
| Clay Pit | Clay | Confirm the clay supply has an accepting onward chain |
| Coal Mine | Coal | Confirm the Coal service can collect and deliver the additional output |
| Fishing Grounds | Fish | Check the offshore connection and the intended Fish receiver |
| Oil Platform | Crude Oil | Check both the offshore delivery and the liquid-output shipping route |
| Quarry | Stone | Confirm the Stone route and actual downstream use |
| Sand Pit | Sand | Confirm the Sand route and its receiving production input |
This table identifies the listed relationships. It does not promise that each delivery produces the same percentage increase, consumes the same number of Tools per year, or remains active for a fixed duration. Inspect the receiving industry's actual booster state for the current save.
Climate also affects which facilities appear. If the relevant raw industry is absent from the chosen map, a Tools delivery plan must use another accepting destination rather than assuming the facility can always be found nearby.
Supply the booster continuously
A raw industry's cargo booster starts when enough of its specified booster cargo is available in the input stock. The booster consumes that cargo, and the effect stops when there are not enough items for it to run.
A one-time delivery can therefore produce a temporary result rather than a permanent upgrade. Watch the Tools stock and the booster state over further operation before treating the receiving industry as continuously boosted.
The worker booster is a separate condition. Workers arrive through a useful passenger connection and must show up frequently enough to sustain the effect. A cargo delivery of Tools does not establish that workers are arriving, and a successful worker route does not fill the Tools input stock.
Choose the next capacity change based on the failing condition. If Tools stock repeatedly empties while the factory has output waiting, inspect the Tools distribution leg. If the factory itself has stopped producing, inspect its Planks and Plastic inputs before adding more distribution vehicles.
Keep the receiving industry's output pickup in view too. Producing more Coal, Crude Oil, or Sand is not a useful final result if the corresponding output remains uncollected and excess production is destroyed.
Allocate Tools to a useful bottleneck
Start by identifying which downstream chain is limited by the raw industry's available output. If the raw industry is already filling its output stock while vehicles fail to collect it, a booster can increase excess production without fixing the actual transportation bottleneck.
If the output service is working and the downstream receiver can use more cargo, a Tools booster can support that chain. Confirm the effect in the industry's production and stock information, then watch the delivered output rather than assuming the extra throughput became useful supply.
Compare this with a town's Tools demand. Supplying an industrial district achieves a direct town delivery goal, while sending Tools to a mine supports the mine's output chain. Choose according to the actual unmet demand and service capacity in the save.
Do not invent a universal priority order such as “always boost Coal before every town.” The map's existing industries, town requirements, route costs, and uncollected stock can change which destination is useful. Make the decision from the current chain's evidence.
A simple first allocation is easier to verify than splitting limited output across many destinations at once. Once a destination receives Tools reliably and its intended effect is observed, expand the distribution around the remaining demand.
Diagnose a Tools route by the failed stage
| Observed problem | First check | Why another generic expansion may fail |
|---|---|---|
| Tool Factory produces nothing | Planks and Plastic input stocks | More output vehicles cannot create missing inputs |
| Planks arrive but Plastic does not | The Plastic source, compatible transport, and complete receiving connection | Excess Planks do not replace Plastic |
| Tools remain in factory output | Goods-compatible pickup and loading filter | More input capacity can create more uncollected output |
| Town delivery does not satisfy demand | The industrial district's actual required cargo and access | Nearby buildings can demand another cargo |
| Industry receives Tools but expected booster is absent | Specified booster type, current stock, and state | Not every industry uses Tools |
| Booster starts then stops | Replenishment and consumption of Tools stock | One delivery is not a permanent boost |
| Raw output rises but useful deliveries do not | Output collection and onward capacity | More production is different from more cargo reaching the consumer |
Check one route stage after each correction. A delivered load into the actual receiving stock is a stronger confirmation than a vehicle simply completing a circuit. The complete Tools project needs production, pickup, delivery, and the intended consumption or booster effect.
Related guides
Use Cargo Types to check compatible loads, Industry List to identify the exact facility and recipe, and Industry Workers for the separate passenger-based booster.