
Transport Fever 3 normally offers Small, Medium, Large, and Very Large maps. On console, the available range stops at Large. PC players can also enable four experimental sizes—Tiny, Huge, Megalomaniac, and Gigantomaniac—by changing the experimentalMapFeatures setting. Experimental maps require at least 16 GB of RAM.
The largest 1:1 option is Gigantomaniac at 28.672 × 28.672 km. However, the biggest map is not automatically the best map for a particular save. Your useful building space also depends on the generated terrain, town spacing, industry placement, shorelines, and the amount of room left for stations, yards, airports, and road approaches.
The dimensions below apply specifically to the 1:1 map format. Transport Fever 3 also lets you choose a map format, which changes the ratio between the map edges. In-game dimensions are rounded, so the displayed values can differ from the exact dimensions by up to 250 m.
Transport Fever 3 Map Size Dimensions
| Map size | Normal availability | Exact 1:1 dimensions |
|---|---|---|
| Tiny | Experimental | 4.096 × 4.096 km |
| Small | Standard | 8.192 × 8.192 km |
| Medium | Standard | 11.264 × 11.264 km |
| Large | Standard | 14.336 × 14.336 km |
| Very Large | Standard on PC; unavailable on console | 16.384 × 16.384 km |
| Huge | Experimental | 20.480 × 20.480 km |
| Megalomaniac | Experimental | 24.576 × 24.576 km |
| Gigantomaniac | Experimental | 28.672 × 28.672 km |
Do not treat the rounded number displayed in the game as a different map specification. The official dimensions in the table are the exact 1:1 values, while the game presents rounded values for convenience.
Where Map Size and Format Are Selected
In Free Game setup, select a climate and open the Settings tab. The first section, World, contains the controls relevant to the map’s shape and generation:
- Map Size selects the overall size tier.
- Map Format selects the ratio between the map’s sides.
- Seed supplies the value used for random generation.
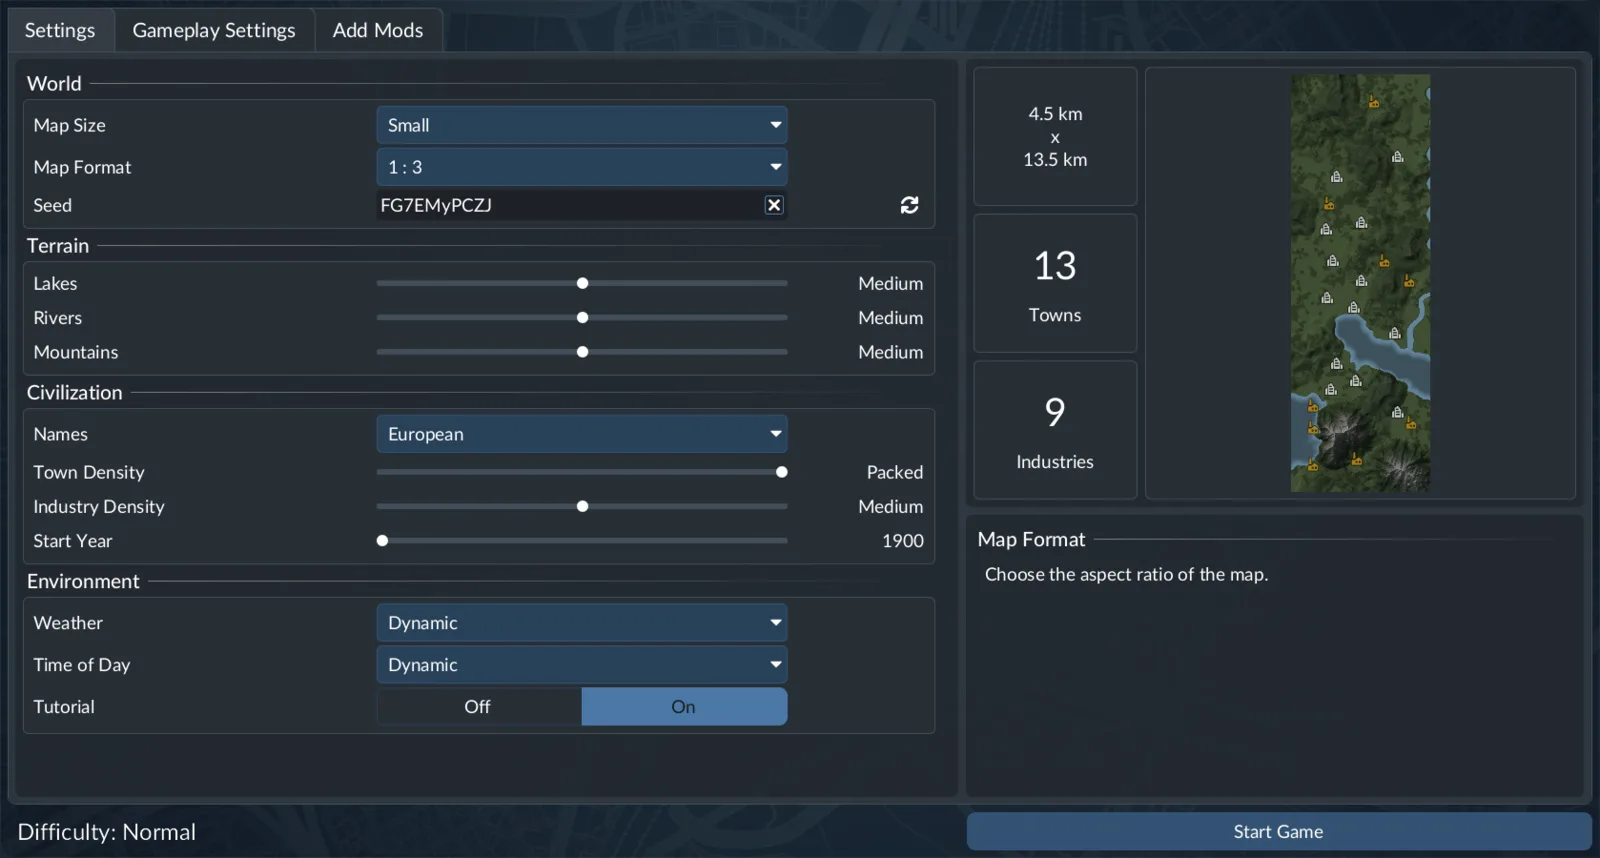
The Free Game world-generation controls are grouped in this settings screen.
Size and format answer different questions. Size controls the selected scale tier, while format controls the relationship between the two edges. The dimension table on this page is therefore a direct reference only when the format is 1:1. Use the 1:1 table when selecting a square map; other formats have different edge relationships.
A seed is useful when comparing setup choices. The same seed combined with the same settings creates an identical map. If you change the size, format, or another relevant setting, you are no longer making a like-for-like comparison. Keep the setup unchanged when you want to reproduce a particular generated world.
Before starting the save, inspect the preview rather than choosing from the size label alone. Two maps in the same size tier can serve different plans because their terrain and generated locations can create different corridors, obstacles, and expansion opportunities.
How to Choose the Right Map Size
Start with the network you intend to build, then select the smallest map that provides enough useful space for that plan. This keeps the decision tied to the save you actually want instead of turning map size into a contest for the largest possible number.
Choose a compact map for a focused network
A compact map is a practical choice when you want one understandable first connection, shorter relationships between destinations, or a network that is easier to read at a glance. It can also make it easier to notice where a transfer or connection is failing because fewer parts of the network compete for attention.
Before accepting the map, confirm that it still contains the terrain and destination layout needed for your intended service. A smaller map is not helpful if mountains, water, or awkward placement leave too little room around the places you want to connect.
Choose a larger map for regional expansion
A larger option better suits a plan built around distant regions, multiple transport modes, or several independent areas that may eventually become one network. The extra dimensions can provide space for long intercity links and later expansion, but only if the generated geography leaves usable corridors between the important locations.
Do not choose a larger tier merely because you might use the space someday. Decide what the initial connection will be, where a second region could be added, and whether there is sufficient room for the infrastructure that joins them. If the preview does not support that progression, regenerate or revise the setup rather than assuming the map-size label will solve the layout.
Judge usable space, not only total dimensions
A map’s edge length does not reveal how convenient it will be to build on. Mountains may concentrate routes into narrow corridors. Rivers and coastlines may shape where roads or railways can cross. Town and industry placement may create either clear transport relationships or awkward gaps. Large open areas may still be poorly positioned for the network you intended.
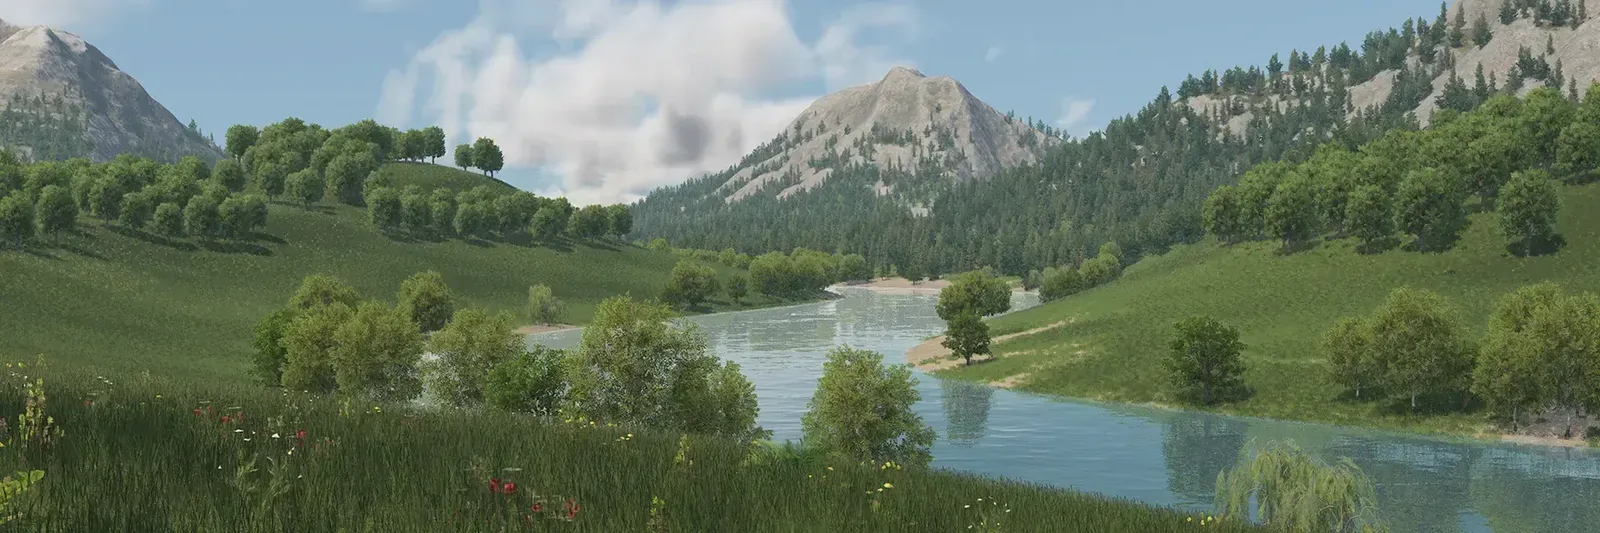
Natural terrain and river corridors can limit or guide usable building space.
Use the preview to answer concrete planning questions:
- Are the towns positioned at distances that suit the passenger services you want to operate?
- Do industries and destinations support the cargo relationships you intend to establish?
- Are there visible corridors through or around difficult terrain?
- Is there room near important destinations for stations, approaches, yards, and later expansion?
- Do shorelines and rivers support your plan, or do they divide the areas you need to connect?
- Can you identify one clear first connection without depending on an undeveloped, map-spanning network?
These checks are more useful than looking for a universally optimal preset. Transport Fever 3 does not have one map size that is automatically correct for every network.
Choosing Between the Standard Sizes
The standard size range gives most players enough flexibility without enabling experimental features. Use the following decision path to narrow the choice.
- Define the first service. Identify the first two points you expect to connect and the transport mode you want to use.
- Define the expansion direction. Decide whether the save should remain focused or eventually connect several regions.
- Inspect the generated layout. Look at town spacing, industry placement, terrain barriers, and open space around likely terminals.
- Check construction room. Make sure important locations have space for approaches and future changes, not merely a narrow route between them.
- Consider hardware load. Larger maps tend to need more RAM and, in most cases, more CPU power.
- Choose a smaller tier when uncertain. A map with one clear starting network and visible expansion room is more useful than a larger map with no coherent first plan.
Small can suit a tightly scoped or learning-oriented save. Medium offers more separation without immediately moving to the upper end of the normal range. Large provides additional room for broader plans and remains the largest option available on console. Very Large extends the normal PC range but should be selected because the intended network needs that scale, not simply because it is available.
These are planning recommendations rather than fixed gameplay requirements. No size requires a particular number of towns, industries, routes, or transport modes.
How to Enable Experimental Map Sizes
Experimental map sizes are controlled through the experimentalMapFeatures key in settings.lua. The file is located in the game’s userdata folder. Find the game file location for your installation to locate that folder.
Follow this sequence:
- Close Transport Fever 3 before editing the settings file.
- Open the userdata folder for your installation.
- Find and open
settings.lua. - Locate the
experimentalMapFeatureskey. The keys are usually ordered alphabetically, which can help you find it. - Change the value of
experimentalMapFeaturestotrue. - Save the file.
- Restart the game and return to the map setup options.
- Confirm that Tiny, Huge, Megalomaniac, and Gigantomaniac are now available.
The experimental setting also enables the possibility of changing the economy in an existing save. That additional capability can lead to unstable situations, so enabling the flag has an effect beyond adding map-size choices.
At least 16 GB of RAM is required for experimental-size maps. Meeting that minimum does not guarantee a particular frame rate or simulation speed. Hardware configuration, the map, and the network that develops during the save can all affect the result.
If the extra sizes do not appear, check the setup in a strict order:
- Confirm that the game was closed while the file was edited.
- Confirm that you changed the file in the correct userdata folder.
- Confirm that the key is spelled exactly
experimentalMapFeatures. - Confirm that its value is
true. - Confirm that the file was saved before the game restarted.
Check the setting in the userdata file used by your installation, then restart the game to review the map-size options.
Map Size, Memory, and Simulation Load
Map size correlates with the amount of RAM required and, in most cases, with the CPU power needed. Smaller maps tend to run more fluently on most computers. This is a directional relationship, not a formula that predicts exact performance for a specific preset.
A developed city contains extensive transport infrastructure and traffic.
A larger world can leave room for more places, routes, and activity, but the eventual load also depends on what you build. For that reason, no map-size table can promise a particular frame rate, simulation speed, or late-game result. The 16 GB requirement establishes the minimum for experimental maps; it is not a performance guarantee.
Use a practical risk check before committing to an experimental world:
- Decide whether the save genuinely needs a tier above Very Large.
- Consider whether you prefer broad geographic scale or smoother operation on a smaller world.
- Avoid assuming that unused empty space makes the largest tier free of additional resource demands.
If your priority is a manageable network, dropping one size tier can be more useful than preserving empty distance. If your priority is a sprawling, multi-region build, the larger tier may be worthwhile, but it comes with greater hardware considerations and more space to manage.