

Transport Fever 3 terrain tools permanently modify the map surface. Use Smooth to soften irregular ground, Flatten to create a level surface from a chosen reference height, Raise or Lower for larger height changes, and Heightmap Texture for controlled surface detail. Set brush size, strength and shape before applying the tool, and inspect the result in small passes.
These tools do not reshape ground occupied by buildings, roads or tracks. Trees and rocks adjust their position as the terrain changes, but an occupied construction area can block the effect. Ground painting is a separate operation: it changes the surface material without changing the terrain height or affecting gameplay.
Choose the tool for the change you need
Open Landscaping and use the Terrain tab for height changes. The other landscaping tabs cover vegetation and ground material, so confirm the active category before assuming that every brush alters the surface geometry.
Smooth reduces sharp edges, small hills and small holes. Flatten levels ground according to the height where the operation begins. Raise increases elevation, while Lower cuts down into the surface. The Heightmap Texture tool adds smaller irregularities using a selected template as a brush mask.
| Tool | Main purpose | Important limitation or control |
|---|---|---|
| Smooth | Soften surface irregularities | It changes the shape rather than selecting one flat height |
| Flatten | Create a level area | Starting position supplies the reference height |
| Raise | Build higher terrain | Flatten or Smooth is often better for filling a hole |
| Lower | Create a hole or canyon | Flatten or Smooth is often better for removing a hill |
| Heightmap Texture | Add irregular surface detail | Full intensity can produce very rough ground |
Choose by the required result rather than cycling through every tool. A station footprint that needs a level surface calls for a different operation from a hillside that merely needs softer edges. Starting with the appropriate tool reduces the amount of corrective work afterward.
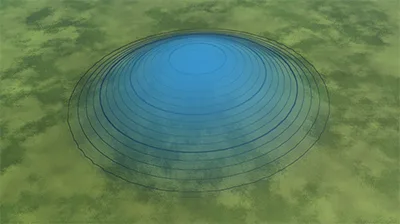
The affected area is shown by the brush footprint; it is separate from the strength control.
Inspect the existing terrain before applying it. The rail-construction view shows contour lines, and the terrain layer can provide another overview of elevation. A change made with the slope visible is easier to judge than a brush pass applied only from a distant scenic angle.
Set the brush before touching the landscape
Brush size controls the area affected, while Strength controls the intensity inside that area. They answer different questions. A larger brush is not simply a stronger brush: it can include ground beyond the intended work area even when the strength remains modest.
The brush shape can be a circle with blended edges, a circle with sharp edges or a square. Choose a shape that fits the work. Blended edges suit transitions, while a clearly bounded footprint can help define the region you want to level. Inspect the visible footprint before applying the effect.
Rotation changes the orientation of the selected shape. It is more apparent with a square or another directional brush than with a perfectly symmetrical circle. Use the control only when the orientation of the footprint matters to the area being edited.
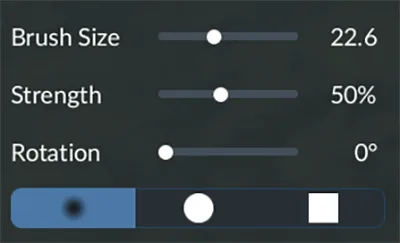
The default PC controls use comma and period for brush size, O and P for strength, and N and M for rotation. They are context-dependent construction actions and can be remapped in the Keyboard settings. Use the panel's values and the visible footprint to confirm what a key changed.
Begin with a manageable area and a moderate effect, then inspect the surface. This is a practical editing method rather than a fixed recommended strength for every landscape. The right setting depends on the existing shape and how much change you intend to make.
Flatten from the height you actually want
The Flatten tool uses the height at the position where the operation starts as its reference. Choose that starting point deliberately. Beginning on a hilltop and beginning at its base can produce different level surfaces even when the brush size and strength are identical.
Identify the desired level in the surrounding terrain, then begin the operation there. Move across the intended area while checking the transition around its edge. The aim is a usable level region, not an accidental plateau created from an unsuitable starting point.
If the resulting height is wrong, stop and reassess the reference point before applying more passes. Repeating the same flattening operation from the wrong reference does not answer the height problem. Use the correct start and inspect how the new surface meets the untouched ground.
For a construction site, check the necessary footprint after leveling. The tool does not guarantee that a building or track will fit merely because the ground looks flat from above. The construction proposal is the separate check for the actual structure's requirements.
Smooth transitions instead of changing everything at once
Use Smooth when the surface has sharp edges, small elevations or shallow holes that should blend into the surroundings. It reduces irregularity without treating every point as a single chosen-height platform. That distinction is useful when a flatter central area still needs natural-looking edges.
Work around the edge of the modified region and inspect it from more than one angle. A top-down view can hide a steep side that becomes obvious from a lower camera position. Contours help show the transition as well as the visual texture.
Do not enlarge the brush merely because one small area still looks rough. A larger footprint can alter nearby terrain that was already satisfactory. Keep the smoothing task tied to the boundary or irregularity you identified, then expand only when the additional area needs the same treatment.
Smooth is also useful for smaller holes or hills. Raise and Lower are available for broad height changes, but a repeated large raise over a small depression can create another shape that then needs repair. Select the operation that matches the surface problem you can actually see.
Raise and lower for deliberate large changes
Raise creates higher ground and can be used to form mountains. Lower cuts into the surface for holes or canyons. Use them when the intention is a new height feature, then refine the result with the other tools if a level platform or softer transition is needed.
Inspect the affected area while applying the brush. Strength and size combine to determine how broadly and intensely the operation changes the landscape. A large, strong pass can create more corrective work than a sequence of smaller, visible adjustments.
Keep the nearby network in view. A terrain feature may look suitable as scenery while making the next road or railway proposal more difficult. Roads and tracks have different gradient constraints, so shaping a slope that works for a road does not establish that a rail approach can climb it.
Use the actual construction preview when the terrain change serves an infrastructure plan. Identify whether the proposal forms a surface route, bridge or tunnel, and inspect its cost. Terrain tools alter the ground; construction controls decide how the chosen road or track fits that ground.
Understand why occupied ground does not change
Buildings, streets and tracks occupy ground that terrain tools do not modify. If part of a brush pass appears to do nothing beside a station or road, check for that occupied surface before assuming the strength setting is too low.
Trees and rocks behave differently: their positions adjust to the changed terrain. Their presence is therefore not the same kind of obstruction as a constructed road or building. Inspect the terrain itself rather than judging the tool solely from whether a tree remains visible.
Do not respond by holding the brush indefinitely over the blocked area. More intensity does not change the tool's rule about occupied ground. Decide whether the surrounding terrain needs editing, whether the proposed construction can be repositioned, or whether a separate deliberate infrastructure change is required.
Preserve the important connections when evaluating that separate change. Demolishing a road or track to expose the ground is an infrastructure action with consequences beyond the landscaping brush. Review the affected network and use a saved copy of the world before a larger reconstruction.
Add texture detail without roughening the entire map
The Heightmap Texture tool applies a small template as a mask for the brush. It adds irregularities and surface detail rather than importing a complete map heightmap. Choose the template and strength according to the local feature you want to create.
Avoid full intensity for ordinary refinement because it can make the landscape very rough. Begin with a smaller effect, inspect the terrain, and repeat only if the detail still serves the intended region. This keeps a texture-detail operation from overwhelming the wider shape.
The template tool and a whole-map heightmap import are different tasks. Importing a map establishes its broad terrain, while this landscaping brush changes a selected local area. Do not look for a saved-map import workflow inside every brush setting, or assume selecting a template replaces the entire world.
Check the final surface with construction previews when the detail is near a transport corridor. An attractive rough hillside can still complicate a planned alignment. Keep the functional space readable, and apply finer detail after the underlying terrain has the form you need.
Keep paint separate from terrain height
Ground painting applies materials directly to the surface. It does not change height and has no gameplay effect, so it is free even outside Sandbox mode. Use it to change the appearance of an already shaped area rather than expecting it to level ground or remove a construction obstruction.
Incline Threshold limits which slopes receive paint. With Paint Steep disabled, only areas not steeper than the threshold are affected. Enabling Paint Steep reverses that selection so steeper parts receive the material instead.
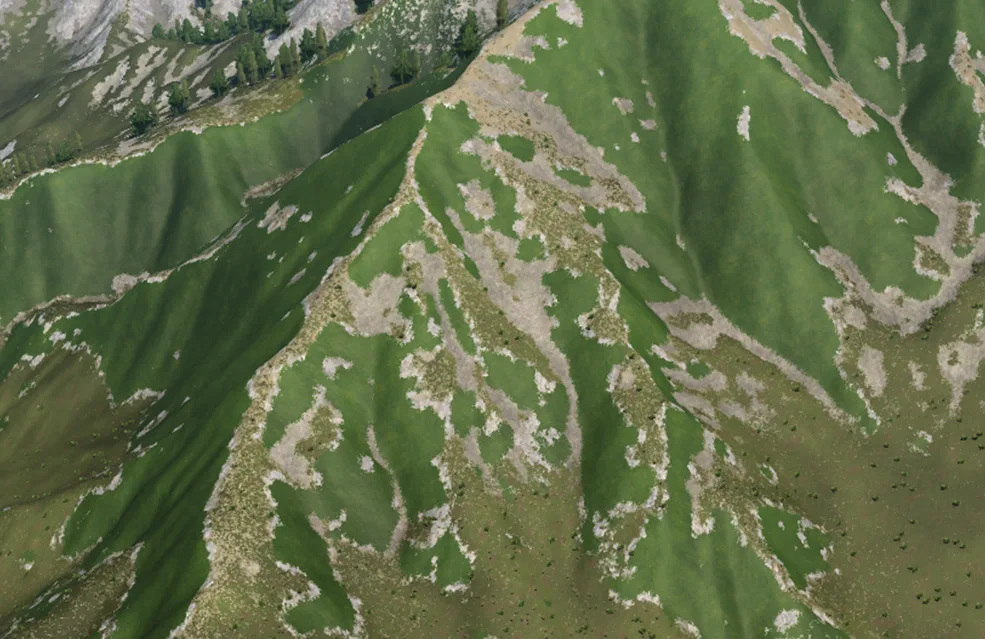
Use those controls to separate the appearance of a slope from the flatter surrounding ground. Inspect the actual painted result, because changing a threshold changes which surface is selected rather than how high or low that surface becomes.
Shift can force painting over ground textures applied by infrastructure. The eraser resets ground to default textures. Those are material operations, not demolition or terrain reshaping. Keep that distinction clear when the painted road edge or station area looks different but its underlying construction remains unchanged.
Finish with the construction result you intended
After shaping, inspect the region from a useful angle and with the elevation information visible where necessary. Check the central surface, its transitions and any occupied ground the tool could not alter. Do not judge the result only by the paint material or the position of decorative vegetation.
If the work prepared a site for a road, railway or building, open that construction tool and test the intended proposal. Check connections, gradient, curve restrictions, demolition warnings and displayed cost before confirming. These checks verify the purpose of the terrain edit rather than only its appearance.
Keep Follow Terrain and fixed construction incline separate from the landscaping brush. They alter how infrastructure is proposed against the ground, while the brush changes the ground itself. Compare the available construction approaches before deciding to reshape a larger region.
Save the useful result after confirming that it meets the intended site or corridor requirement. A successful terrain-tool session leaves the correct height, controlled transitions and a buildable proposal where you need one. Additional vegetation or painting can refine its appearance afterward without being mistaken for the work that made the terrain usable.