
Industry workers are an optional production booster in Transport Fever 3. Give an industry a usable passenger connection, bring a sufficient number of workers there frequently, and its overall production throughput can increase. The booster stops when too few workers have visited recently, so placing a stop or seeing one vehicle arrive is not enough: the complete passenger journey must continue to attract and deliver workers.
Start with a small, affordable service and verify the result in stages. Confirm that passengers use the intended journey, check the worker list in the industry's Booster section, observe production, and then make sure the freight network can collect and deliver the additional output. Set capacity and service intervals from the worker status and actual passenger movement at the target industry, rather than copying a target from a different route.
Understand What Workers Change
Workers increase an industry's throughput through a passenger-based booster. They are not a production input, and an industry does not necessarily stop operating merely because it has no worker service.
Keep these mechanics separate when diagnosing an industry:
| Mechanic | What it does | What to inspect |
|---|---|---|
| Required production input | Allows an industry with an input requirement to produce | The production rule and Input Stocks |
| Worker booster | Increases overall throughput while enough workers arrive frequently | The worker entry and worker list in Booster |
| Raw-industry cargo booster | Uses the relevant booster cargo from input stock | The separate cargo entry in Booster and its available stock |
| Output collection | Removes finished cargo for transport to a destination | Output Stocks, waiting cargo, pickup vehicles, and line configuration |
A passenger route addresses the worker booster. Diagnose required production inputs and freight collection separately before buying another passenger vehicle.
Read the Industry Window Before Building
Open the target industry's window and establish a baseline before changing the network. This gives you something concrete to compare with the result of the worker service.
- Read the production rule at the top of the window. Raw industries can produce without input cargo, while processing industries require the listed input cargo before production can begin.
- Note the amount consumed and produced during the displayed period and the theoretical yearly maximum.
- Expand Booster and identify the worker entry. If the industry is raw, do not confuse workers with its separate cargo booster.
- Inspect Input Stocks and Output Stocks. If a required input is absent, workers will not replace it. If finished cargo is already accumulating, more production may not be the most useful first investment.
- Record the current state of the worker entry, production figures, stocks, and freight collection. Use the same fields for the later comparison.
For a raw industry, also look at its productive plots. Farms, mines, logging camps, and similar industries depend partly on their surrounding fields, shafts, or other plots. Blocked space or demolished plots can limit production independently of the worker booster. A passenger connection should not be treated as a cure for lost productive area.
Decide Whether the Industry Needs More Throughput
A worker route is most promising when the industry itself is restricting an otherwise usable flow. Look for a situation in which the required inputs are available, the destination can use more cargo, and the freight service has room to carry additional output.
Delay the worker investment when finished cargo is already waiting faster than it can be collected. In that case, inspect the pickup line, vehicle movement, loading activity, and road or terminal congestion first. Increasing production can add more stock without delivering more useful cargo. Output that remains uncollected can reach the stock limit; production continues, but excessive items are destroyed.
Also check the next industry or customer in the flow. A downstream factory waiting for a required input presents a different problem from an upstream industry that needs more throughput. Read the relevant production rule and stock fields before assigning workers as the cause.
Choose the Smallest Complete Passenger Connection
A worker needs a complete passenger journey from a populated origin to the industry. Compare complete services rather than individual vehicles or impressive infrastructure.
Direct Town-to-Industry Service
A direct passenger line is usually the clearest test. It has fewer moving parts, makes passenger behavior easier to observe, and isolates the worker experiment from the rest of the network. Its disadvantage is that it creates another line and fleet with their own running costs.
Use this pattern when the town and workplace can be connected without a complicated detour. Keep the initial fleet modest. The purpose of the first version is to prove that people use the connection and that the industry counts them as workers, not to buy capacity for demand that has not appeared.
Extension of an Existing Passenger Line
Extending a nearby passenger line may require less new infrastructure, but the added leg changes the complete circuit. Existing passengers spend time on the revised route, vehicles take longer to return, and the industry's stop may still attract fewer workers than expected.
Inspect the line after the extension rather than assuming that an already busy service will automatically serve the workplace well. A platform full of passengers elsewhere on the line does not prove that anyone is traveling to the industry.
Feeder and Transfer Service
A feeder can connect the industry through a larger passenger station or another transport mode. This can fit a network you already intended to build, especially when a direct road connection is impractical. It also creates more failure points: passengers must reach the first stop, use the intended line, complete the transfer, and board the final service to the workplace.
Judge the feeder as one end-to-end journey. If workers fail to register, trace each leg separately instead of adding vehicles to every line at once.
| Connection | Main advantage | Main risk | Best first check |
|---|---|---|---|
| Direct line | Simple to build, observe, and diagnose | A separate route may cost too much for the demand | Whether passengers board for the industry |
| Existing-line extension | Reuses part of the current network | The detour can weaken the rest of the service | The full circuit, transported passengers, and balance |
| Feeder or transfer | Can reach an awkward or remote workplace | A broken transfer can hide the real failure | Passenger movement at every interchange |
Connect the Town Side of the Journey
Place or select a passenger stop that gives residents access to the service. Inspect the relevant passenger connection rather than relying on an unrelated coverage display. Maintenance coverage, cargo access, and passenger access answer different questions.
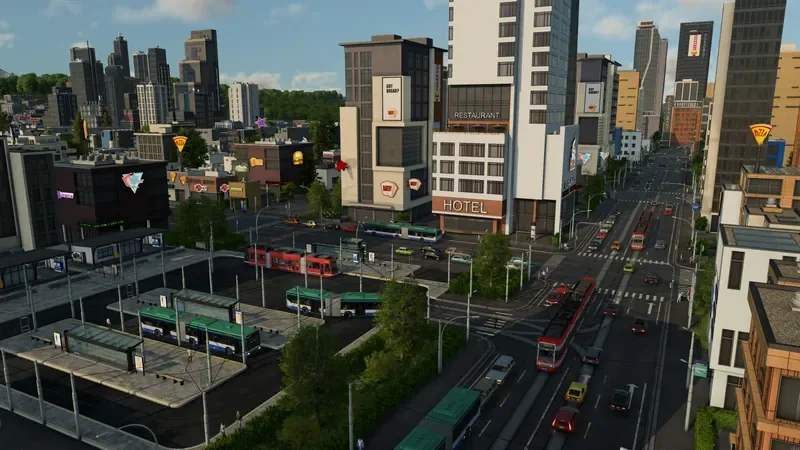
Choose a town that can plausibly originate the journey, but do not treat proximity alone as proof. Once the service runs, inspect whether passengers actually use the intended route. If the nearest town produces no riders for that workplace, more vehicles will only add unused capacity.
When a transfer is necessary, verify that both services meet at usable passenger facilities. A vehicle without passenger capability cannot carry workers. Check the actual passenger capacity of the chosen vehicle on each leg, including any mixed-capability service, and verify that the complete journey operates.
Create and Operate the Passenger Line
Build the route as a working service, not merely a colored line on the map.
- Inspect the industry for an existing passenger-capable terminal before constructing an additional roadside stop. The available facilities can differ, so verify the actual industry rather than assuming every site accepts the same setup.
- Create a passenger line between the town-side stop and the industry's usable passenger stop or terminal. If the trip needs a transfer, create and verify every leg.
- Add the stops in the required order. A selected stop is inserted into the line after the currently highlighted stop or waypoint, so review the final sequence before operating the service.
- Assign appropriate passenger vehicles. A route without vehicles cannot bring workers, and a vehicle without passenger capability cannot provide this service.
- Start the complete service. Watch actual passenger movement instead of judging the design solely from the route overlay.
- Keep the initial test easy to read. Avoid changing the worker service, freight capacity, road layout, and destination at the same time, because simultaneous changes make the result harder to diagnose.
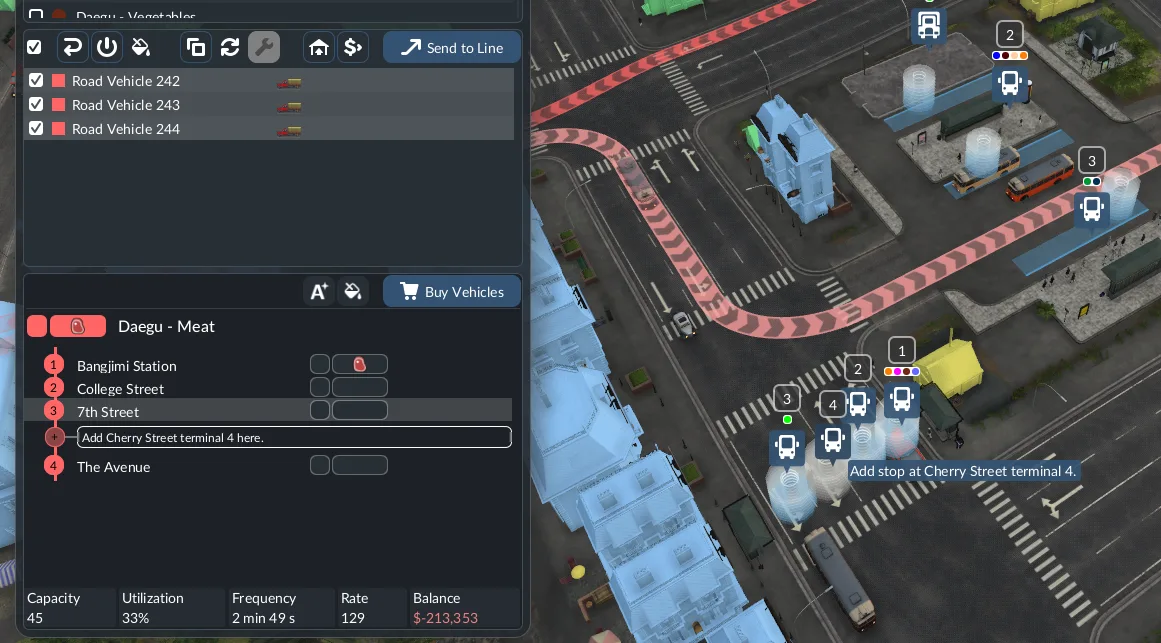
This cargo-line example shows the Add Stop control. Use the same line-manager operation to add stops to your passenger service.
The line's details can help you distinguish service activity from industry response. Its basic information includes capacity, current load, rate, and frequency. The transported section shows the number of passengers moved during the last year and can be expanded to show the longer trend. These values tell you whether the line is operating, but the industry's Booster section remains the place to confirm that arrivals count as workers.
Check Stops and Terminal Assignment
Review the stop list when vehicles run but the intended journey does not work. Confirm that the industry stop is on the correct line, appears in the correct order, and is reachable by the assigned vehicles.
Terminals are assigned automatically according to reachable platforms and their utilization. If the automatic choice does not serve the intended passenger movement, the stop's terminal assignment can be adjusted from the line controls. Recheck the result after any change instead of assuming that moving the assignment has solved the worker connection.
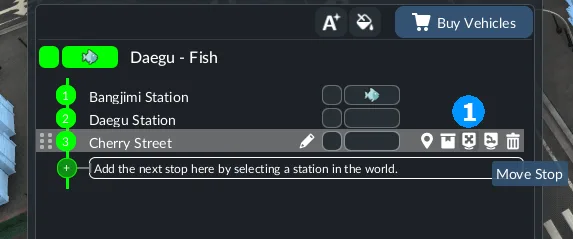
The Fish line illustrates the Move Stop control. For a worker service, apply the control to the intended passenger stop and check the resulting connection.
Do not use a precise universal catchment distance when placing the final stop. The reliable test is whether passengers complete the journey and appear in the industry's worker information. If arrivals occur nearby but the worker entry does not respond, inspect the selected stop or terminal and its connection to the industry.
Confirm That the Worker Booster Is Sustained
Open the industry and expand Booster after the passenger service has begun operating. The worker list is the direct confirmation point. Vehicle arrivals, waiting passengers, or a busy platform are useful observations, but none independently proves that the industry has counted enough workers.
Check the service in this order:
- Passengers use the intended journey. Follow the line and transfers to confirm that riders are traveling toward the workplace.
- The industry registers workers. Inspect the worker entry and expanded worker list in Booster.
- The booster remains active. Continue observing repeated service cycles. The effect stops when too few workers have recently visited.
- Production responds usefully. Compare the industry's production fields with the baseline while keeping other major conditions as stable as practical.
- The freight network uses the result. Check output stock, pickups, destination demand, and delivered cargo rather than stopping at the booster icon.
Tune the service from the actual worker list, production state, and line activity, and observe repeated arrivals rather than treating one visit as sustained service. Add capacity only when the passenger movement and worker list show that the existing service is the limiting part.
Fix an Industry Worker Connection That Is Not Working
No Passengers Board in Town
Check that the origin is a passenger stop with access to potential riders and that the assigned vehicle carries passengers. Confirm that the line includes a real destination at the industry rather than ending at an unrelated nearby facility.
Inspect the intended journeys when that information is available. If passengers prefer another route or do not recognize the workplace journey, overlapping services and more capacity may not change their choice. First prove that the route itself is usable.
Passengers Start the Trip but Never Reach the Industry
Trace the journey leg by leg. At every transfer, verify the arriving stop, the departing stop, the next line, and the vehicle assigned to that line. A working town bus does not compensate for a missing final service, and a passenger reaching a port or station is not proof that the workplace leg exists.
Check line stop order and terminal assignment. Also confirm that vehicles can physically reach every assigned stop. Correct the first broken leg, run the service again, and then inspect the next stage.
Vehicles Arrive but the Worker Entry Does Not Respond
Open Booster and inspect the worker list instead of using the platform crowd as the success signal. Recheck whether the selected final stop or terminal actually provides the industry connection. If the stop is only visually near the site, adjust the connection based on what the interface reports; do not rely on an invented distance rule.
Also make sure you are looking at the worker entry rather than a raw industry's separate cargo booster. Passenger vehicles affect workers, while the cargo booster consumes its specified cargo from input stock.
The Booster Activates and Then Stops
The service is not sustaining enough recent worker arrivals. Inspect line frequency, capacity, actual load, and transported-passenger history together. A vehicle can run frequently while carrying few relevant passengers, and a full vehicle can still arrive too irregularly to sustain the industry.
Look for delays across the entire circuit, including transfer waits and road congestion. Make one measured change—such as improving the operating service or removing a broken transfer—then watch repeated cycles. Do not apply a fixed interval copied from a different industry or map.
Workers Register but Production Still Looks Low
Return to the production rule. A processing industry still needs its required inputs. A raw industry's productive plots can still limit output. The worker booster improves throughput; it does not erase these other conditions.
Compare production over a meaningful operating period rather than immediately after one arrival. Use the displayed consumed, produced, and theoretical figures, then examine input and output stocks. This separates a real production constraint from a short observation window.
Production Rises but Deliveries Do Not
Inspect Output Stocks and the waiting-cargo indicator. Produced items remain at the industry until a suitable vehicle on a correctly configured pickup line collects them. If stock accumulates, the next constraint is freight collection rather than worker supply.
Then check whether the destination can use the cargo. The worker route has succeeded only at increasing industry throughput; it has not guaranteed a useful downstream result. Keep this check brief and return detailed cargo-chain or unloading problems to their dedicated guides.
The Service Works but Costs Too Much
Open the passenger line's balance chart and compare income with running costs over time. Include any infrastructure and additional freight capacity needed to use the extra output. A successful booster can still be a poor investment when its service is expensive or when the network cannot profitably move the result.
Before expanding the fleet, compare the direct route with a smaller extension, a simpler feeder, or another supplier that better fits the existing network. Choose the layout that improves the complete operation, not the one with the most vehicles.